To connect a Linux router to a VPSnet private network over WireGuard, add the site in the VPSnet control panel and download its .conf file, then on Linux install the WireGuard tools, put the file in /etc/wireguard, turn on IP forwarding and start the tunnel with wg-quick, which adds the routes itself. Tested on Ubuntu 24.04.5 LTS with a fixed public IPv4 address, the router starting the connection.
Before you start
- In the VPSnet control panel open your VPN, choose Connect a site (router), pick Linux and click Next. Enter the site’s networks. Leave Router’s public address for the tunnel (optional) empty when the router is behind NAT or its address changes: the router then starts the connection, which is how this guide was tested.
- Download the .conf file right away: it holds the router’s private key and is shown once.
- Router setup on the site’s row shows the commands below with your file’s real name, ready to copy with Copy all commands; that block starts nothing when the file is already in /etc/wireguard.
The pictures show example values from documentation ranges. Enter the values from your own router recipe.
The pictures of this guide are terminal output from the test run, with the addresses, names and keys replaced by example values.
1. Install the WireGuard tools

Terminal
On Ubuntu and Debian the package is wireguard-tools; WireGuard itself is in the kernel.
sudo apt install wireguard-tools
wg --version
2. Put the configuration file in place
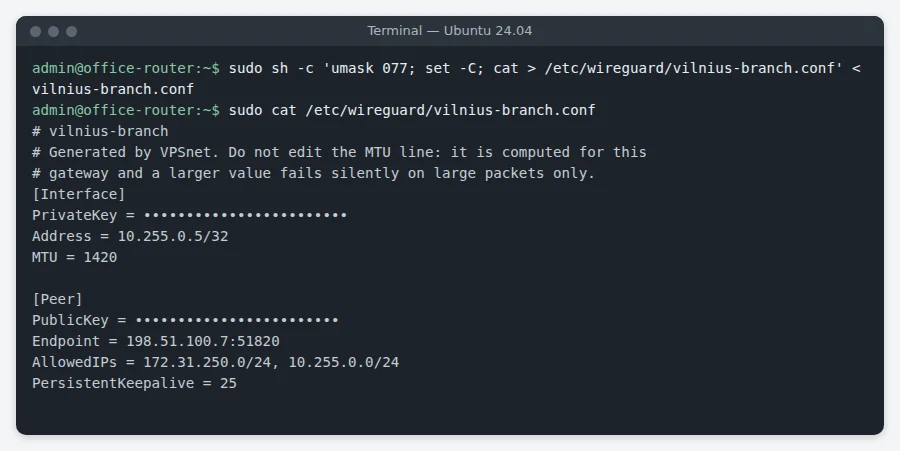
/etc/wireguard/
Copy the downloaded file into /etc/wireguard/ under its own name, readable only by root: it holds the router’s private key. The file name becomes the interface name (here vilnius-branch). If a file of that name is already there, nothing is copied and the command says so: rename the downloaded file first, so another tunnel’s configuration is never replaced.
sudo sh -c 'umask 077; set -C; cat > /etc/wireguard/vilnius-branch.conf' < vilnius-branch.conf
3. Turn on IP forwarding
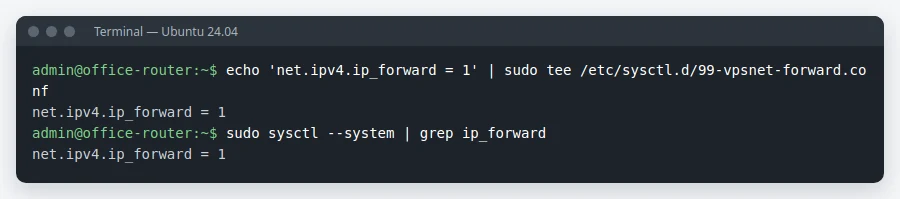
/etc/sysctl.d/99-vpsnet-forward.conf
The router passes traffic between the office network and the tunnel; the setting stays on after a reboot.
echo 'net.ipv4.ip_forward = 1' | sudo tee /etc/sysctl.d/99-vpsnet-forward.conf
sudo sysctl --system
4. Start the tunnel
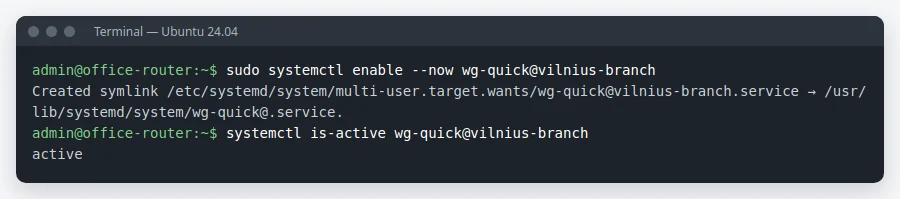
wg-quick@vilnius-branch
wg-quick brings up the interface, adds a route to each AllowedIPs address and starts again after every reboot.
sudo systemctl enable --now wg-quick@vilnius-branch
5. Check the connection
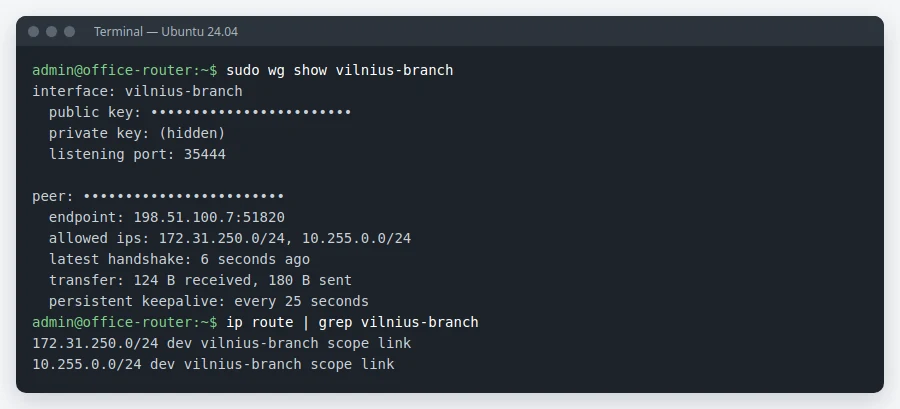
wg show
The latest handshake is a few seconds old and the VPSnet networks go through vilnius-branch. Then ping a VPSnet server’s private address from an office computer.
sudo wg show vilnius-branch
ip route | grep vilnius-branch
Check and troubleshoot
- In the panel, open the site and click Test tunnel: it checks that the router answers, the keys match and traffic passes.
- No handshake: check the Endpoint and PublicKey lines of the file and that outgoing UDP to the VPN address and port is allowed. journalctl -u wg-quick@vilnius-branch shows start errors.
- Handshake but office computers get no reply: check IP forwarding (sysctl net.ipv4.ip_forward) and that your firewall (nftables, ufw) lets traffic pass between the office interface and the tunnel interface, without NAT.
FAQ
Which Linux systems does this guide cover?
It was set up and tested on Ubuntu 24.04.5 LTS (kernel 6.8, wireguard-tools 1.0.20210914) with a fixed public IPv4 address. On other distributions the install command differs; the file and the wg-quick commands are the same.
Where do I get the private key?
Only in the .conf file the panel gives you for the site. It is shown once.
My router is behind NAT. Does it still work?
Yes. The router opens the connection and the keepalive keeps it open.
Can several sites reach each other?
Yes, when “Sites can reach each other” is on for the VPN. The other sites’ networks are then added to AllowedIPs: open Router setup again and add them on the router.
Do I need NAT for the tunnel?
No. The VPSnet servers see the office computers’ own addresses.